Working in Vancouver, it is often difficult to get those interesting on-location hi-key photos during the winter months. The cold weather and dark rainy days limit shooting outdoors, and we get so few sunny days during these months. Many of my clients also work during the day, so a lot of my headshot photo sessions are done in the evening to accommodate busy work schedules. Quite often, I’m shooting in-studio using a plain backdrop, and using complex lighting setups to get the hi-key look for some of the portraits I produce.
So when I want to produce headshots that look like they were shot on-location, I sometimes need to rely on producing Photoshop composite photos to achieve the final product I’m after. Here’s a sample of what a Photoshop composite headshot looks like before and after:
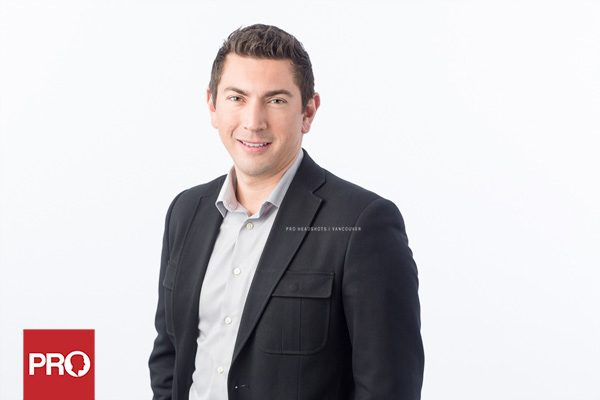
Headshot BEFORE Shot – Shot in Studio against a white background

Background for Headshot Composite Photo
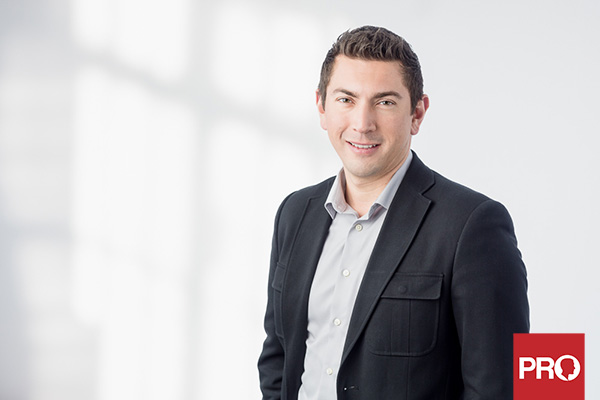
Headshot After Photo – Composited in Photoshop CC
There are many Photoshop compositing tutorials on the web, so I won’t go into the nitty gritty detail of how to produce composite photos. But here are some valuable tips I’ve picked up along the way that will help you produce headshot composite photos that are easy to achieve and look realistic:
1. Use the Same Key for Composite Photos!
If you are planning to produce composite photos that is hi-key (i.e. lighter and brighter background), shoot the headshot against a background that approximates the color or key of the replacement background. So if the background you are adding in has a lighter tint (such as in the example above), try shooting the original headshot on a background on white or something close in key or tint.
Doing this will make it a lot easier to cut out your subject using Photoshop’s masking tools or a third-party tool like Topaz Labs’ Remask. This is especially helpful when you go to mask out the subject’s hair. If I had shot the above example on a darker backdrop, it would have taken a lot more work to mask out the subject’s hair for the lighter background.
2. Shoot Your Own Out of Focus Backgrounds
Whenever I see a cool potential background that combines colour, light, and shadow in interesting ways, I’ll shoot it out of focus and will save a copy on my computer for later use. As I shoot it, I’m keeping in mind the type of headshots I typically produce and apply just the right amount of out of focus blur in-camera. I also try to collect a number of different backgrounds I think can work for darker or moodier headshots as well as hi-key or brighter headshots.
Producing your own out of focus background doesn’t require you to scout out interesting locations. You also don’t need to purchase pre-made backgrounds for composites, although there are good resources out there if you do. Most of my shots are take around the studio, at home, or at a local park during a walk. There’s no need to find these backgrounds in hard-to-access places or to spend a lot of money buying them since they’re going to be out of focus anyway. Almost any place with a mix of interesting light, shadow, and color will do.
3. Use a Good Image Masking Program
Photoshop includes a good masking tool for a large number of objects, but I’ve found that other tools do a better job at extracting or masking out hair. If you’re extracting an object with a relatively smooth edge, Photoshop is fine. However, for subjects that have intricate edges (e.g. human hair or fuzzy sweaters), I’ve found that using a tool like Topaz Labs Remask, OnOne’s Perfect Layers, or Vertus Fluid Mask 3 makes the producing an accurate and clean mask a little easier.
4. Match up the Direction of Light
After you’ve extracted your subject and placed him or her on a layer above your chosen background images, the next set is to match up the direction of light. It’s usually easier to match up the background with the foreground subject than the other way around, but of course, that all depends on your particular image. A good way to achieve this is to use the Photoshop Curves tool to bring the overall exposure up or down to match the foreground subject. Then use a gradient mask to produce a directional lighting effect that matches the direction of light of the background with that of the foreground subject.
You may also need to flip the background image to match up with the direction of light on your foreground subject. In the image example above, I shot the background with the window light reflecting off a white wall on the right of the frame, but because I shot my subject’s headshot with an Elinchrom Rotalux Octa from the left, I decided to flip the image in Photoshop (using the Flip Horizontal adjustment under the EDIT > TRANSFORM menu) to match up the direction of light.
Keeping these tips in mind before and during production of your composite headshot photo will help you achieve final images that look as natural as possible. If you have any questions or comments, please leave them behind in the comments section below.